As mentioned in one of my recent blog posts, my sister got engaged in September 2017. The wedding is fast approaching and Chris and I knew pretty early on that we wanted to give the happy couple a wedding present with a personal touch. We are big fans of working with wood, whether it be tree stumps, drift wood or pallets and therefore, we had been thinking about possible presents for a while.
We collected a piece of driftwood while taking a brisk walk along Bude beach on New Year’s Day and we knew straight away what we wanted to do with it. We’ve not worked with driftwood before but knew it would make a perfect chopping or cheeseboard… and so the cheeseboard project began.
Some of you may think that a cheeseboard is relatively easy and not very labour intensive and we would both agree. It hasn’t taken tons of our time, however, when the happy couple are trying to combine furniture from two different properties the last thing they need is another item of furniture being thrown into the mix. Therefore, Chris and I decided to play it safe. This project still took longer than expected though and with the geographical distance between Chris and I, took some diary management and my love of planning to fit in.
Once we had allowed almost 2 weeks of initial drying time in a bedroom kept at an average temperature, we first needed to cut the piece of drift wood to size using a circular saw. Next, I used an electric sander to tackle the brunt of the work to make the surfaces smooth and then the hand sanding began. The hand sanding was definitely the longest part of the process but was well worth it when you consider the end result.
For those of you thinking this sounds like a one person job, it kind of is. But don’t let that fool you, Chris helped in a big way. While I was busy sanding the drift wood for approximately 3 hours, Chris was busy making cups of tea and with a spare piece of wood, he spent time practicing with the new tool he purchased from Facebook – a hand router – as we were intending to engrave the driftwood with the couples initials and the wedding date.
Whilst Chris’s efforts with the hand router were not in vein, unfortunately we didn’t have a router bit small enough to engrave the cheeseboard with the design we had planned so decided to leave this for another project. Once we were happy that all the surfaces had been sanded and smoothed, Chris applied three coats of teak oil, allowing a couple of hours drying time between each application. This really brought the grain out in the wood and helps to protect against splitting and drying out.
Having applied several coats of oil and ‘completing’ the chopping board, we decided at the last minute it needed some handles. A quick visit to our local DIY store – Properjob – saw us purchase two matte black draw handles that suited the rustic feel perfectly. Granted these did take a little bit of persuasion to fit as the screw were thicker than the pre-drilled holes; a couple of drill bits and pilot holes later and the chopping board was completed.
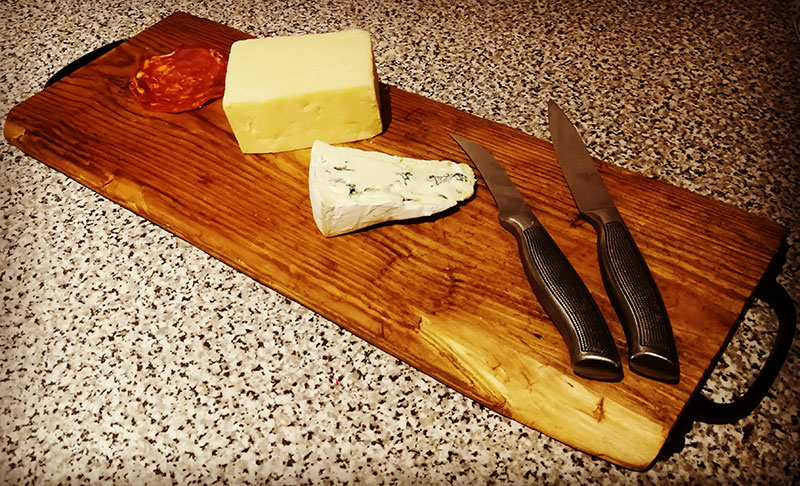
Overall, we were delighted with the end result and when presented to the bridge and groom, they too were grateful and excited to use it. In total this did take a great deal more time than we originally expected but the results in the image above speak volumes. It really is amazing what a bit of imagination, time and effort can achieve. We’re excited to move on to our next project having completed this one.
Products bought and used: Butcher block oil and teak oil and a pair of handles.
Recycled products: Driftwood found on Bude beach.
Tools used: An electric sander, sand paper, hand router and router bits, electric drill and drill bits.
Man hours: 6.
Project hours: 4 weeks including drying time and allowing oil to soak in.
Cups of tea consumed: 4 each.
Overall cost (minus the milk and teabags): About £15 including left over teak oil and sanding paper.